Showing posts with label Make It. Show all posts

Friday, June 28, 2024

Rose Petal Shower Tea


As much as I enjoy sitting in a hot tub under the stars, I'm really more of a shower person. 

I love the idea of soaking in a tub with lovely scented rose petals. I thought that maybe I could come up with a similar experience for the shower.

Tub teas are a blend of ingredients that soften and scent the water in which you bathe. The shower tea that I have created will give you a fragrant, uplifting experience with all of the skin benefits of rose petals.

Rose petals are widely used in skincare products. They help to soothe and nourish the skin. A rose petal shower can easily become part of your self care routine. 

The ingredients used in the Rose Petal Shower Tea are safe for your skin. If you have any concerns, try scrubbing just one area first and wait to see if you have any adverse reactions.

•Rose petal shower bags have just three ingredients: 6 parts dried rose petals, 1 part colloidal oatmeal and 1 part grated bar soap (unscented) 

•Mix the dried rose petals and colloidal oatmeal. You can store this part in a glass jar. Keep the grated bar soap in a separate container.

•Fill your soap saver bag with a heaping 1/3 cup (or 7 tablespoons) of the dry shower tea mixture. Add 1 tablespoon of grated bar soap to the bag. 

•In the shower, rub the soap bag between your palms to mix and activate the contents. You are now ready to enjoy an invigorating aromatherapy experience. Add more water to the soap bag, as needed.

After you have showered, empty the bag, rinse it out and then hang to dry. You can reuse your bag, but your shower tea is for one time use only. 

If you don't grow your own roses, you can purchase dried rose petals. For my Rose Petal Shower Tea I used packets of unscented Aveeno oatmeal. One packet is about 1/3 cup which you will mix with approximately 2 cups of dried rose petals. I use a castile bar soap for my Rose Petal Shower Tea and it works quite nicely.

There are lots of different types of soap saver bags. The sisal variety will give you a refreshing exfoliating shower experience. Depending on how much you want to spend, you can get soap saver bags that can be laundered.

Rose Petal Shower Tea is a wonderful treat for the senses and it makes a great handmade gift. Enjoy your rose petal shower!


πŸ”To return to the main page, please click on the banner at the top of this page or click on this link: Cupola Corner Blog 


Saturday, May 26, 2018

More Mud: Rose Petals & Lavender Clay Mask

My daughter, Sarah, with French Rose Clay, Rose Petals & Lavender Buds Facial Mask
Time to pamper yourself! Give this French pink clay mask recipe a try and enjoy an amazing and rejuvenating clay mask experience.

This mask is one of my original recipes. It uses French pink clay which just seemed to beg for roses, which in turn demanded a hint of lavender. It smells divine. This is a smooth mask that applies easily, feels great and dries quickly. It is gentle enough to use on a regular basis. This recipe uses dry ingredients so it can be stored indefinitely.

French rose/pink clay is good for normal, dry, sensitive and mature/aging skin. French rose clay is a blend of red illite and white kaolin clays. It is very mild. French pink clay is light, smooth and luxurious. It’s probably my favourite. 

Clay masks are best mixed in a ceramic or glass bowl with a wooden spoon. When making your own masks, always remember to do a skin patch test to determine sensitivity to the mask. Before using a clay mask, cleanse your skin to remove make-up and surface dirt. When rinsing off the mask, remember to thoroughly rinse out the sink and flush out the drain with running water. If you use a facecloth to clean off the mask, use an old one, especially with French pink clay. 

Rose Petals & Lavender Clay Mask Recipe

2 tablespoons dried rose petals, ground
2 tablespoons dried lavender buds, ground
3/4 cup French Rose clay
water or lavender water or rose water

  1. Grind dried lavender buds and dried rose petals using a grinder or mortar and pestle. Use only rose petals, not the calyx.
  2. Using a wooden spoon, thoroughly mix ground lavender buds and rose petals with the French pink clay.
  3. Store clay mixture in a glass jar.
  4. Mix 2 tablespoons of dry clay mask mixture with 1 to 1¼ teaspoons of water (or lavender water or rose water). Use a small wooden spoon or stick to blend. Add additional drops of liquid until you have the desired consistency.
  5. Apply to face and allow to dry for 5 to 10 minutes. Wash off with warm water using an old face cloth. Follow up with a moisturizer.
Enjoy!

Botanic Planet is a good source (Canadian) for clay and botanicals.

πŸ”To return to the main page, please click on the banner at the top of this page or click on this link: Cupola Corner Blog

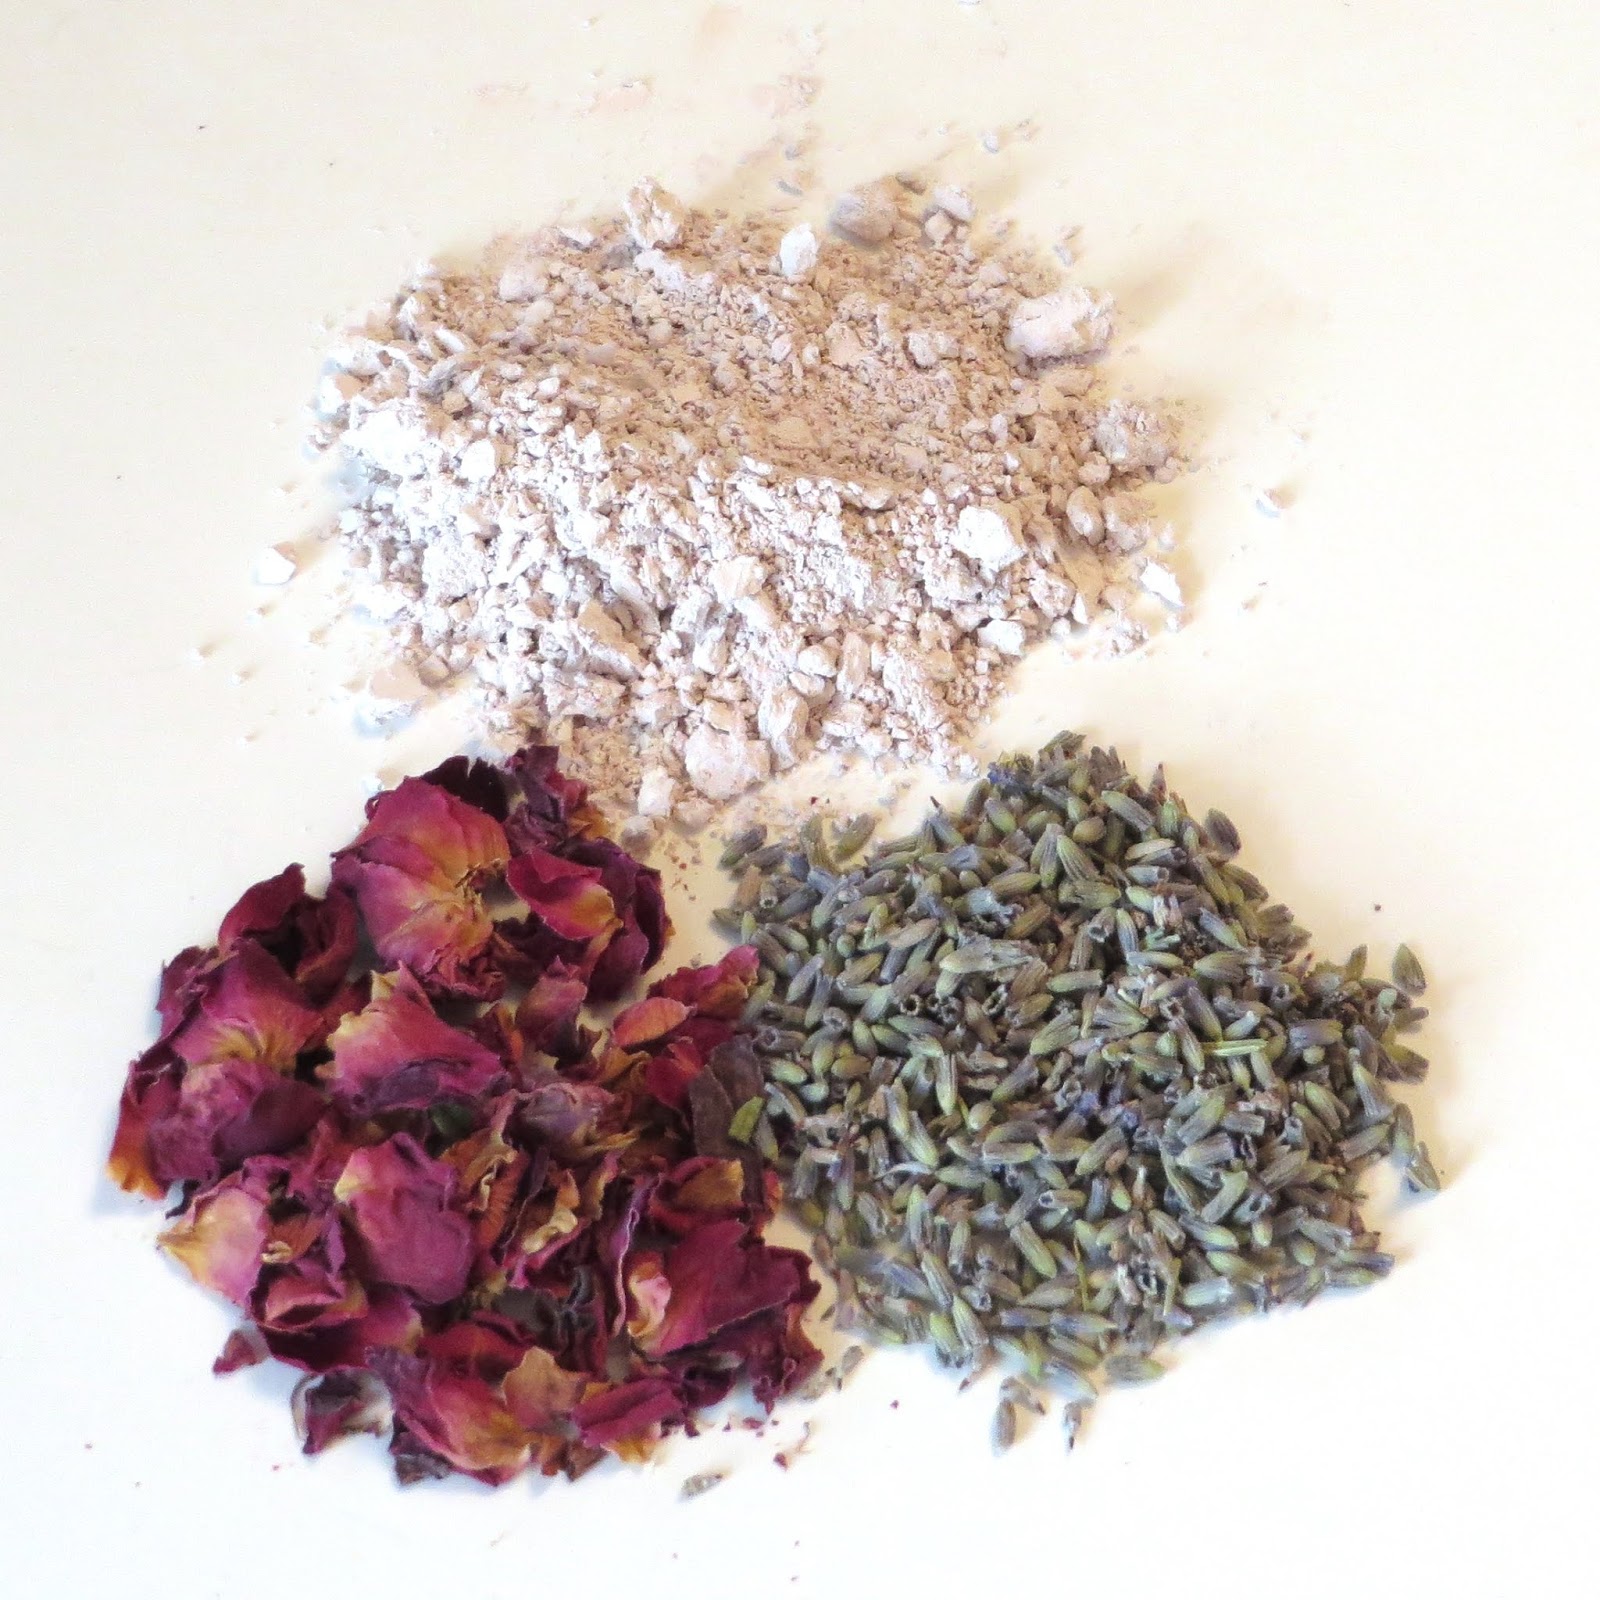
Rose Petals & Lavender Clay Mask Recipe French Rose Clay, Rose Petals & Lavender Buds

French Rose Clay, Rose Petals & Lavender Buds


Tuesday, May 22, 2018

Floral Water: Lovely Lavender

Lovely Lavender Floral Water
I’ve always liked floral waters and have been intrigued by the idea of creating scented water from flowers. I recently gave it a try and it was astonishingly easy to do. I call my creation Lovely Lavender and, needless to say, I love it.

Lavender water has lots of uses. It’s great as a facial toner. It can be added to your clay face mask recipes. Put some of your lavender water into an atomizer and use it as a linen or room spray. Or give yourself a spritz to relieve sunburn pain, or just because it smells great and it will make you smell great, too.

Lovely Lavender floral water is made with witch hazel. You can find witch hazel in most pharmacies or health food stores. Witch hazel has many of its own amazing properties and uses. It is a natural antioxidant and anti inflammatory, and is used extensively in skin care products. Witch hazel also acts as a stabilizer and gives your floral water a longer shelf life.

I always think that it's a curious thing that when you steep lavender, the water is not purple like the flowers. The same thing happens when you make lavender jelly. It still smells wonderful, though, even if it's not lavender in color,

Lovely Lavender Floral Water
1 cup water
1/4 cup dried lavender flowers
2 tablespoons witch hazel
  1. Boil water and pour over the lavender flowers. Allow to steep 20 to 30 minutes. 
  2. Strain lavender water several times through cheesecloth to remove the lavender flowers.
  3. Put witch hazel into storage container and then pour in the warm lavender water. Cool, cap and store in refrigerator for up to six months. 
  4. Shake well before each use. 

Botanic Planet is a good source (Canadian) for botanicals.
If you’re just looking for lavender, check out Weir’s Lane Lavender and Apiary.

You can learn more about lavender by reading this post: Lavender Love 

πŸ”To return to the main page, please click on the banner at the top of this page or click on this link: Cupola Corner Blog

Lavender from Garden


Tuesday, May 08, 2018

More Mud: Herbal Clay Mask

Making your own mud masks is a fun way to treat yourself. Create something special that meets your personal skin care needs and pamper yourself on a regular basis.

Mud masks recipes use a variety of different clays that target different skin types. This Herbal Clay Mask uses bentonite clay. I use this mask only occasional to detoxify my skin. Bentonite clay is great on a more regular basis for oily or acne prone skin types.

Bentonite clay is made from aged volcanic ash. It is highly absorbent and draws out impurities. Bentonite is electrically charged which helps it to draw out the impurities in your skin. Because of the electrical charge, you must use a wooden spoon or stick to mix masks that use bentonite.

The original recipe for this Herbal Clay Mask suggests grinding the ingredients in a food processor. I used a mortar and pestle. This recipe can be used as a scrub or a mask. Start out with a five minute mask application to see how your skin tolerates the detoxification process. If you have normal or mature/aging skin you may want to first try this recipe as a scrub. Remember to follow up with a moisturizer.

Before using a clay mask, cleanse your skin to remove make-up and surface dirt. When washing off the mask, remember to thoroughly rinse out the sink and flush out the drain with running water. If you use a facecloth to clean off the mask, use an old one.


Herbal Clay Mask Recipe

3/4 cup colloidal oatmeal
1/4 cup dried lavender buds, ground fine
1/4 cup dried calendula, ground fine
1/2 cup powdered milk, ground fine
1/2 cup bentonite clay

  1. In a grinder or food processor, grind lavender buds, calendula and powdered milk. A mortar and pestle will also work. 
  2. Mix all ingredients together in a glass container. Don't put the clay into the food processor. Don't use metal with the bentonite clay. 
  3. Store clay mixture in a glass jar.
  4. For a scrub, mix 1 tablespoon of clay mixture with approximately 2 teaspoons of water to make a paste. With finger tips, lightly scrub face. Use olive oil or honey instead of water if you have dry to normal skin. Rinse with warm water. 
  5. To use as a mask, mix 2 tablespoons of the mask with approximately 3 to 4 tablespoons of a half and half blend of apple cider vinegar and water to make a paste. Apply to face and allow to dry for 5 to 20 minutes. Wash with warm water. Follow up with a moisturizer.
N.B.: Bentonite clay absorbs a lot of water. You may have to adjust the amount of fluid that you add to the dry mix.


Thank you to Melissa @ Pioneering Today for the recipe on which this clay mask was based. 

Botanic Planet is a good source (Canadian) for clay and botanicals.

πŸ”To return to the main page, please click on the banner at the top of this page or click on this link: Cupola Corner Blog


Sunday, April 01, 2018

Easter, Eggs & Shaving Cream

Easter eggs have been around a long time. They were a part of spring festivals and celebrations long before there was Easter. Eggs symbolize new life. They were a natural fit for Christian beliefs and were easily assimilated into Easter traditions. Even coloured or decorated eggs predate Easter. Decorated ostrich egg shells, that were found in Africa, are over 60,000 years old.

Egg decorating in the Christian tradition began with eggs that were stained red to symbolize the blood of Christ. Over time, egg decorating took on many different looks, some of which continue today. Decorations often held symbolic meanings related to Easter or spring. Ukrainian Pysanka are perhaps the most well known decorated eggs. These amazingly beautiful eggs are decorated using a wax resist (batik) method.

When my daughter was about eight years old, my mother and I took her to a Ukrainian egg making workshop at a local art gallery. We have no Ukrainian family connections, but lots of curiosity and we learned the basics in an evening. That being said, I can assure you that it would take years of practice to be able to create the eggs that you see in pictures.

Over the years, as egg traditions continued, chocolate eggs made their debut in Europe in the mid 1800s. The popularity of chocolate eggs has grown steadily and today millions of chocolate eggs are consumed every year.

This year, I wanted to make some decorated Easter eggs to help give the house a spring look. I decided to try making some shaving cream Easter eggs. It was lots of fun and I’m pleased with the results. The marbled look is lovely and each egg is one of a kind. The directions were easy to follow. Shaving cream Easter eggs could be made with children, under supervision. The instructions include information about how to make the eggs using whipped cream so that they can be eaten.

Whether you celebrate Easter or not, I wish for you a lovely spring day and hope that you have the opportunity to spend some time with family and friends on this holiday weekend. And, of course, I hope that you are enjoying some Easter eggs of your own.


πŸ”To return to the main page, please click on the banner at the top of this page or click on this link: Cupola Corner Blog


Shaving Cream Easter Eggs


Sunday, February 04, 2018

“Jar”spiration: The Miniature Marvel of Terrariums

Closed Terrarium with Dragon's Tongue
Gardeners can get really impatient this time of year. Your garden is sleeping peacefully, but you are not. If you have the indoor space and are able to start seedlings, your inner gardener can be somewhat assuaged. The rest of us read about gardens and overwater our indoor plants.

This winter, I got inspired by a really cool looking jar and I decided that a terrarium would be the perfect activity for a cold winter day. It turned out that I was right!

My miniature marvel has inspired me and I am already planning terrarium gifts for a multitude of occasions in the coming year. I’ve been visiting second hand stores for jars and reading up on suitable plants for terrariums.

Creating your own terrarium is a relatively easy task and it’s a great activity for all ages. Here are the basic steps for making a terrarium...
  • Start with a clear glass jar that is big enough to hold the layers of planting material and the plants. If you are making a closed terrarium, your jar will need a lid. A wide mouthed jar makes planting easier. 
  • Place a layer of washed 1/4” decorative stone in the bottom of the jar. Marbles, beach glass or aquarium gravel will also work. 
  • Then, lay down a thin layer of washed activated charcoal followed by a thin layer of sphagnum moss. The charcoal layer will help to filter the air in the closed environment and the moss will help to prevent the soil from settling down into the stones. Use gloves when handling the sphagnum moss.
  • Next, add two to three inches of soil, depending on the size of your jar. Use potting soil that is for indoor plants. If you are planting African violets, use African violet potting soil.
  • Place your plants in the terrarium and firmly press the soil around them. 
  • Add small decorations or accents, if you wish. 
  • Water lightly and cover with the lid. 
A closed terrarium only needs to be watered every few weeks/months. An open terrarium will need watering more frequently. If the soil gets dry, water sparingly. Keep your terrarium out of direct sunlight or it will become a solarium and you’ll bake your plants. Condensation is a necessary part of the water cycle that occurs inside your closed terrarium. If a lot of condensation forms on the inside of the glass, you have over watered and you will need to tip the lid for a day or two to let the excess water evaporate. Remove dead or damaged leaves from your terrarium.

There are lots of options when it comes to choosing plants for your terrarium. African violets, begonias, peperomias and ferns are great choices, but many other types of house plants can also be used in terrariums. Succulents and cacti should only be used in open terrariums.

The Spruce has a great page in their container gardening section called “Getting Started With Terrariums”. It is an excellent resource with lots of ideas and suggestions.

The New Terrarium by Tovah Martin
If you get inspired and want to try something different, you may want to have a look at Tovah Martin’s book, The New Terrarium: Creating Beautiful Displays for Plants and Nature. It’s filled with amazing photos, great ideas and lots of excellent information about creating and caring for terrariums.

Making a terrarium is not only a great activity for a cold winter day, your finished miniature marvel is also good for your health. All of the traditional benefits of having plants in your living or work space can also be attributed to your terrarium...stress reduction, improving mental focus and lowering blood pressure. If you're looking for a winter pick-me-up, a terrarium might be just what the doctor ordered. How could enjoying nature inside not be good for you?

It also turns out that terrariums are trendy. Yes, indeed, they are back in a big way and these are not your '70s terrariums. It seems that I'm not the only one who's experienced "Jar"spiration. Terrarium parties and Terrarium Nites are very popular. From millennials to baby boomers and beyond, terrariums are providing an opportunity to be creative with new and interesting materials in new and interesting ways.

You don't, however, have to be on trend to make or enjoy a terrarium. Check your basement, under the kitchen sink or in the back of your closets and cupboards. You've probably got a glass jar somewhere in your home that would make a great terrarium. Get it out and get busy. It's time for you to experience "Jar"spiration and the miniature marvel of your very own terrarium.


πŸ”To return to the main page, please click on the banner at the top of this page or click on this link: Cupola Corner Blog
Cookie Jar Closed Terrarium with African Violet Bubble Bowl Open Terrarium with a Variety of Succulents

Apothecary Jar Closed Terrarium with Begonia Rex Teapot Closed Terrarium with Brasil Philodendron Scandens


Friday, February 02, 2018

Winter Day Wonder: Simmering Citrus Potpourri

Ingredients for Simmering Citrus Potpourri
Doors closed. Windows closed. We don’t normally batten down the hatches or board up the windows when winter arrives, but we do our best to ensure that the cold stays outside. When winter weather keeps us indoors, we end up living in an environment with minimal air exchange. The air that we breathe can get stale and sometimes even stinky. It’s time to give the air in your house a fresh new smell!

Citrus is my scent of choice for a winter air freshener. It smells clean, lifts the spirits and just smells happy. A simmering potpourri is the perfect solution for stale winter air. Mix up the ingredients, simmer throughout the day and enjoy the lovely fragrance. I use a small crock pot, but a pot on the back of the stove will work nicely. If you are using a pot on the stove, you will need to add water throughout the day.

Give my recipe a try, or mix up something with your own favorite scents.


Simmering Citrus Potpourri:

Mix the ingredients in a small crock pot. Heat on high until simmering and then turn down heat to low for the rest of the day.

  • 1 small or medium orange, sliced
  • 1 or 2 lemons, sliced
  • 1 tablespoon dried peppermint leaves or sprig of fresh peppermint or few drops of peppermint extract, or combination thereof
  • cinnamon stick, optional
  • 2 cups of water

Enjoy your own winter day wonder today!

πŸ”To return to the main page, please click on the banner at the top of this page or click on this link: Cupola Corner Blog

Ingredients for Simmering Citrus Potpourri Ingredients for Simmering Citrus Potpourri


Sunday, January 14, 2018

In a Meadow, We Can Build a Snowman

Mini Snowman with Sammy the Squirrel
I love snowmen. If winter is part of your life, you have probably built, if not loved a snowman at some point, too. From Frosty to Bonhomme, snowmen make their appearance in popular culture through song and story, but snow people have actually been around for centuries.

Bob Eckstein, the author of The History of the Snowman, found evidence of snowmen in the 12th century. Snowmen were very popular in the Middle Ages and Michelangelo was once commissioned to sculpt a snowman. Snowmen have also played a role in both religious and political history. From festivals of old that sought to bring entertainment to the cold of winter to their modern day equivalents, people continue to be intrigued by snowmen.

We are more than likely fascinated by snowpeople because they are, well, like people. Humans like to create effigies. Wikipedia describes snowmen as anthropomorphic. We not only like to build them, we also like to think of them as having human qualities. Throughout the centuries, building a snowman has been a way to create something that celebrates creativity and cold, snowy winters.

I can remember building snowmen as a child and I can remember building snowmen with my daughter. It was lots of fun. These days I usually restrict myself to building miniature snowmen. It’s still lots of fun, and it still gives me the opportunity to be creative out-of-doors during the winter. Snow is like a free art supply...no Michael’s coupon required.

If it’s been years since you built a snowman, it’s been too long. Bundle up and head out to enjoy one of the positive opportunities that winter has to offer. The best days for building snowpeople are when the temperature is hovering near the freezing point. Fresh snow is also helpful. Start small and consider inviting a friend if you want to build larger snowpeople. Snowmen don’t have to be works of art to be appreciated. They can provide entertainment and pleasure just by existing. Snowmen are one of the things about winter that you can love, so get out and get creative! A snowman is waiting for you.

Big Snowman in Our Backyard

πŸ”To return to the main page, please click on the banner at the top of this page or click on this link: Cupola Corner Blog

You can purchase Bob Eckstein's book The History of the Snowman on Amazon.

To see a Readers' Digest summary of the book, click here: Readers' Digest

"20 Frosty Facts About Snowmen", by Mental Floss, can be viewed here: Mental Floss


Sunday, December 03, 2017

The Possibilities of Potpourri

Merry Christmas Potpourri
I've always loved potpourri. It's a wonderful way to have the garden come inside with you for the winter. I decided this year that I wanted to try something new for Christmas. I made a list of my favourite Christmas smells, did some research and came up with a list of ingredients for my “Merry Christmas Potpourri”. I can now enjoy the "Scents of the Season" all month long.

“Merry Christmas Potpourri” is a dry potpourri, but it has no fixative or essential oils. Mix it up around the beginning of a December and enjoy it’s lovely fragrance right up until Christmas. You can refresh the fragrance by adding fresh ingredients, stirring it up to release the natural oils or by adding a few drops of essential oil.

The quantities of the ingredients are approximate and will vary with the size of your display container. Use a glass container so that you can show off all of your lovely creation. Experiment with your potpourri! Add more, add less, add something different. Stick to dry ingredients, though, in order to keep your potpourri smelling wonderful all month long.

My husband and I had lots of fun making the cedar curls. I borrowed my brother-in-law’s wood plane and we set up our cedar curl workshop on the picnic table. They look great and they smell wonderful. My sister teased me about getting a gerbil... Not happening! We found the little pine cones in a neighbourhood park. The rest of the ingredients came from the bulk food store and the grocery store. I dried the orange slices in my food dehydrator, but you could easily dry them in your oven.

“Merry Christmas Potpourri” would make a lovely gift. Give it a try! Mix it up and make it your own. You'll love enjoying the "Scents of the Season" in your own home.

You can find the recipe here: "Merry Christmas Potpourri"


πŸ”To return to the main page, please click on the banner at the top of this page or click on this link: Cupola Corner Blog

Making cedar curls with a wood plane Making cedar curls with a wood plane